This post contains affiliate links. If you buy through them, we may earn a small commission at no extra cost to you. Learn more.
A small freezer — the drawer under the fridge, a compact upright, or a chest freezer in a closet — fills up in a way that hides half of what’s in it. Bags freeze into lumps that don’t stack, containers come in six shapes, and the thing you want is always at the bottom under a bag of peas that’s been open since spring.
The problem is never capacity. It’s shape. Two rules fix almost everything: freeze flat and store upright, like files in a cabinet; and give every category its own bin. Here are ten freezer organization ideas built on those rules, for freezers that don’t have room to waste, followed by layouts for upright and chest freezers — because they need different systems.
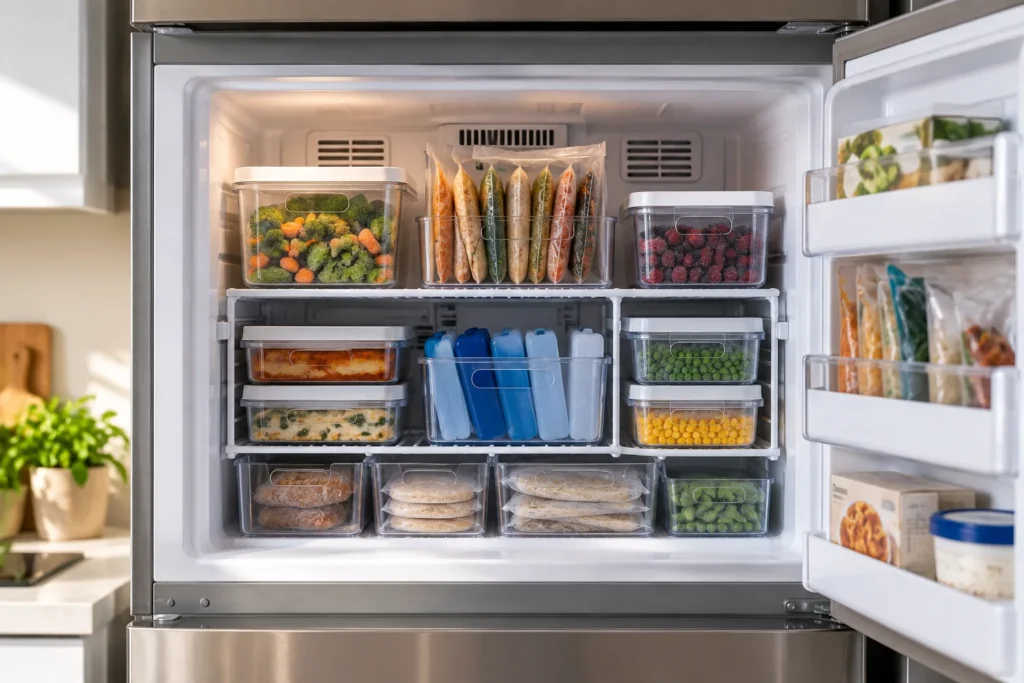
[IMG: an open small freezer with clear bins by category and flat-frozen bags standing upright | alt: Illustration of an organized small freezer]
If you only buy three things
- Freezer-safe clear bins with handles — one per category. Check price on Amazon
- Reusable silicone freezer bags that freeze flat and stand up. Check price on Amazon
- Freezer labels — a date on everything, written in permanent marker. Check price on Amazon
Bins and zones
1. One clear bin per category
A freezer is a pile. Every time you reach for the chicken you move the bread, the peas and the ice cream, and the ice cream ends up at the back where it stays until it’s furry.
Meat, vegetables, fruit, bread, ready meals, ice cream — a bin for each. The bin comes out, you find what you need, the bin goes back. Choose clear bins with handles that are rated for freezer temperatures; ordinary plastic goes brittle and cracks in the cold. Label the front of each bin.
Rental-friendly? Yes.
The catch: freezer shelves are shorter than fridge shelves. Measure the height before buying — most fridge bins are too tall.
Check price on Amazon — around $25–30 for a set.
2. Narrow bins for the door and drawer sides
[IMG: narrow bins in a freezer door holding small frozen items | alt: Illustration of narrow bins in a freezer door]
Freezer doors and the sides of a drawer freezer are the wrong shape for anything — narrow and shallow, so small things fall over and get lost.
Narrow bins fit those spaces and hold the small items: ice packs, butter, nuts, bags of herbs, the bar of chocolate you’re hiding. Keeping small things together stops them disappearing into the big bins.
Rental-friendly? Yes.
The catch: door bins only work if the door shelves are deep enough to hold a bin plus a lip; check. These are about 12 inches long and just under 6 inches wide.
Check price on Amazon — around $15–20.
3. An “eat first” bin at the front
The last two portions of chili, the half bag of berries, the bread heel — they’re the things that get wasted because they’re not enough for a meal and nobody remembers them.
One slim bin, front and center, for anything close to its date or the last of a batch. It’s the first thing you see when the door opens, so it’s the first thing you cook. Same idea as the pantry version, and it works even better in the freezer.
Rental-friendly? Yes.
The catch: it only works if it stays at the front; the first time it’s buried, it’s just another bin. This one is 16 inches long, so check it fits your shelf front to back.
Check price on Amazon — around $10–12.
Freeze flat, file upright
4. Reusable silicone bags
Soups, sauces, cooked grains and chopped fruit go into tubs, and tubs take four times the space of the food inside them.
Freeze them flat in silicone bags — a cup or two per bag, laid flat until solid — then stand the bags up in a bin like files. Flat bags take a fraction of the space of tubs, thaw in minutes under warm water, and the bags wash and refreeze for years.
Rental-friendly? Yes.
The catch: silicone bags need to be sealed carefully; a bag that isn’t closed leaks in the freezer and freezes to the shelf.
Check price on Amazon — around $10–15 for a set of three.
5. A flat-freeze tray
[IMG: flat bags of soup and sauce freezing on a flat tray | alt: Illustration of food bags freezing flat on a tray]
Bags on a wire shelf slump around whatever they land on and freeze into a shape that stacks with nothing.
A rigid tray — a purpose-made freezer tray or a small sheet pan — holds bags perfectly flat until they’re solid. Freeze on the tray, file once frozen. Two trays in rotation handle a whole batch-cooking session.
Rental-friendly? Yes.
The catch: the tray takes shelf space while things freeze; clear a spot before you cook, not after.
Check price on Amazon — around $15–20.
6. A bag stand or file organizer
[IMG: flat-frozen bags standing upright in a file-style organizer in the freezer | alt: Illustration of frozen flat bags filed upright]
Flat bags standing loose fall over in a domino line the moment you take one out.
A simple wire file organizer or a purpose-made freezer bag stand keeps flat bags upright and lets you flip through them by label, like folders. One stand per shelf in an upright freezer, or one on the floor of a chest freezer.
Rental-friendly? Yes.
The catch: this one is a desk file sorter, about 9 inches wide, 11 inches deep and 8 inches tall; check it fits your shelf, and that the bags you bought in idea 4 stand up in it.
Check price on Amazon — around $10–15.
Containers
7. Stackable freezer-safe containers in one size
Ten containers in ten shapes become a landslide. Ten identical containers become two neat columns.
For leftovers and portions: one size, square or rectangular, freezer-rated, same lid. They stack, they line up in a bin, and every lid fits every base. Rubbermaid Brilliance food-storage containers, the same family as the pantry set in our containers guide, are freezer-safe, and a pack of five in one size does the job.
Rental-friendly? Yes.
The catch: glass containers can crack if filled to the top; leave headroom for expansion.
Check price on Amazon — around $25–40.
8. Silicone portion molds
Stock, sauce, baby food and herb butter get frozen in whatever container was clean — then take a whole shelf.
Freeze them in one-cup silicone molds, pop the frozen blocks out, and store the blocks in a single bag. The mold goes back in the cupboard. A shelf of tubs becomes one bag of blocks, each a measured portion.
Rental-friendly? Yes.
The catch: label the bag with what the blocks are; frozen stock and frozen sauce look the same.
Check price on Amazon — around $20–25.
Labels and inventory
9. Freezer labels that stay on
Ordinary labels and masking tape peel off in the cold. A year later nobody knows what the grey block is.
Freezer-rated labels or freezer tape, plus a permanent marker: contents and date, every time, on the side you’ll see when the bag is filed. It takes ten seconds and it’s the difference between a freezer and an archaeology dig.
Rental-friendly? Yes.
The catch: write the date you froze it, not the date you’ll eat it by — you’ll never remember the second one.
Check price on Amazon — around $8–12.
10. An inventory sheet on the door
A chest freezer in particular is impossible to know without unloading it.
A magnetic whiteboard or a printed sheet on the freezer door, one line per item, crossed off as you use it. It becomes the shopping list and the meal plan. Grab our free printable freezer inventory.
Rental-friendly? Yes.
The catch: it only works if it’s updated the moment something goes in. Keep the marker on the door.
Check price on Amazon — around $10–15 for a magnetic board.
Upright vs chest freezer
[IMG: diagram comparing how to organize an upright freezer and a chest freezer | alt: Diagram of upright vs chest freezer organization]
| Zone | Upright or drawer freezer | Chest freezer |
|---|---|---|
| Most reachable | Top shelf or front of drawer: eat-first bin, ready meals | Hanging baskets: eat-first, small items, this week’s meals |
| Middle | Filed bags by category, one bin per shelf | Vertical bins by category standing on the freezer floor |
| Bottom | Bulk meat, ice cream, long-term | Bulk meat, whole items, long-term |
| Door / lid | Narrow bins: butter, ice packs, nuts | Inventory sheet on the lid |
In a chest freezer the rule is vertical bins from floor to lid, one column per category, so you lift one column out instead of digging. In an upright, it’s one category per shelf or bin. A drawer freezer under a fridge is an upright turned on its side — two or three bins across, filed bags inside each.
A freezer reset in one evening
- Take everything out onto the counter in a cooler or on towels.
- Throw away anything with freezer burn, anything unlabeled you can’t identify, and anything over a year old.
- Sort into categories, then into bins.
- Refreeze any lumpy bags flat (thawed slightly, pressed flat on a tray) and file them.
- Label everything without a label, and write the inventory sheet.
It takes about an hour, and it’s the last time you’ll have to do it if you keep freezing flat.
Mistakes
- Freezing in the store packaging. Bulky, unlabeled, wrong shape.
- Bags frozen in lumps that don’t stack. Freeze flat on a tray first.
- No dates. Everything looks the same at minus 18.
- Overfilling. Freezers need a little airflow, and a jammed drawer is a drawer you stop opening.
Freezer organization FAQ
How do I organize a small freezer drawer?
Two or three clear bins across the drawer, one category each, with flat bags filed upright inside them. Keep an eat-first bin at the front and the bulk items at the back. Measure the drawer height first — freezer drawers are shallower than they look once the frost line is accounted for.
What are the best bins for a freezer?
Clear, handled, and rated for freezer temperatures so they don’t crack when you pull them out full. Rectangular rather than round, so they fill the shelf. Freezer shelves are shorter than fridge shelves, so check the height of any bin before you buy it.
How do I organize a chest freezer without buying bins?
Use sturdy reusable shopping bags as vertical columns — one per category — and label the handles with tape. Lift a column out, take what you need, drop it back. It’s the budget version of bins and it works surprisingly well for a first pass.
[IMG: vertical pin image of an organized freezer with the post title | alt: Pinterest image of small freezer organization]
Freeze flat this week
Don’t reorganize the whole freezer tonight. From today, freeze everything flat and dated, and stand it up in one bin. In a month the freezer will have organized itself, and the reset above will take twenty minutes instead of an hour.
Related: best pantry storage containers · 11 tiny pantry ideas.
Affiliate disclosure: Shelf and Nook is a participant in the Amazon Services LLC Associates Program and other affiliate programs. As an Amazon Associate we earn from qualifying purchases. Links on this page may be affiliate links, which means we may earn a commission if you make a purchase, at no extra cost to you. Read our full Affiliate Disclosure.