This post contains affiliate links. If you buy through them, we may earn a small commission at no extra cost to you. Learn more.
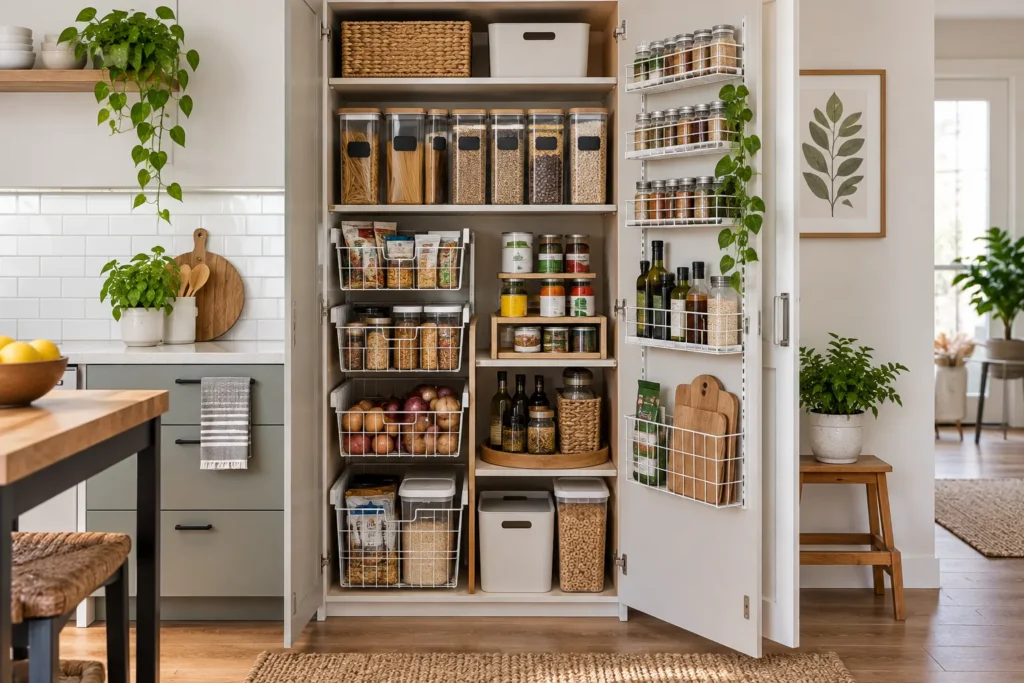
A pantry reset is different from buying a few bins. It’s starting from empty: every item out, every date checked, every shelf cleaned and measured, and everything put back in a system that makes sense for how you cook. Done properly, it takes a weekend, and it holds for months.
This guide walks through the ten steps in order, split across Saturday and Sunday. It works for any small pantry — a closet with wire shelves, a single tall cabinet or a set of open shelves. If you don’t have a pantry at all, start with how to create pantry storage without one, then come back here.
[IMG: a freshly reset small pantry with clear zones, bins and labeled canisters | alt: Illustration of a pantry after a weekend reset]
If you only buy three things
- Washable shelf liner — protects rental shelves and stops bins and jars sliding. Check price on Amazon
- Clear bins with handles — the containers that turn packets into a system. Check price on Amazon
- A two-tier turntable — fixes every deep corner in one move. Check price on Amazon
Saturday: empty, sort and prepare
Step 1. Empty everything
You can’t reorganize around things. Every item comes out — every shelf, the floor, the door — and onto the counter or the kitchen table.
- Clear every shelf, the floor and the door
- Sort into categories as you go
- Put anything that belongs elsewhere in a separate pile
Group as you unload so the counter doesn’t become one big pile: breakfast, baking, pasta and grains, cans, snacks, sauces and oils, spices, drinks. Collapsible bins make temporary sorting stations and fold away afterwards.
Rental-friendly? Yes.
The catch: it always looks worse before it looks better — give yourself an hour for this step alone.
Check price on Amazon — around $20–30 for a set.
Step 2. Check every date
Most pantries hold food that’s past its best: spices from three moves ago, a half-bag of flour that’s gone stale, crackers that are open and soft.
- Bin expired and stale food
- Combine duplicate open packages
- Donate unopened food you won’t use
Check every date. Bin anything expired or open and stale, combine duplicate open packages into one, and set aside unopened food you’ll never use for a food bank. This step usually frees a quarter of the space before you buy anything.
The catch: “best by” is about quality, not safety, for most dry goods; use your judgment, but be ruthless with anything open.
Step 3. Clean and line the shelves
Empty shelves are the only chance you’ll get to clean them properly — and to protect them.
- Vacuum and wipe every shelf
- Let shelves dry completely
- Cut and lay non-adhesive liner
Vacuum crumbs, wipe with warm soapy water and dry completely. Then cut a washable, non-adhesive shelf liner to size. It protects rental shelves from spills and stops bins and jars sliding.
Rental-friendly? Yes — non-adhesive liner lifts out without a trace.
The catch: adhesive liners can pull paint off rental shelves; choose the non-adhesive kind. This roll is 12 inches wide and 20 feet long.
Check price on Amazon — around $10–15.
Step 4. Measure before you buy
This is the step that saves money. Most pantry organizers that get returned simply didn’t fit.
- Depth, width and height of every shelf
- Door clearance
- Floor gap width
Measure each shelf’s depth, width and the height to the shelf above, plus the door clearance if you’ll use a door rack. Write the numbers on your phone and take them shopping — product pages always list dimensions. See the measurement table below.
The catch: wire closet shelves are often only 12 inches deep, shallower than many pantry bins.
Step 5. Decide the zones
[IMG: an empty pantry with each shelf marked for a zone: breakfast, baking, snacks, cans | alt: Illustration of a pantry divided into zones]
Before anything goes back, decide what goes where. Zones are what keep a pantry organized after you’ve finished.
- Daily food at eye level
- Cans and canisters on lower shelves
- Backstock on the top shelf
- Spices and packets on the door
Heavy things low, daily things at eye level, rarely used things high, small things on the door. Map your categories onto your shelves using the zone map from 11 tiny pantry ideas.
The catch: don’t zone by what looks nice; zone by how often you reach for it.
Sunday: contain, label and put back
Step 6. Decant only the staples
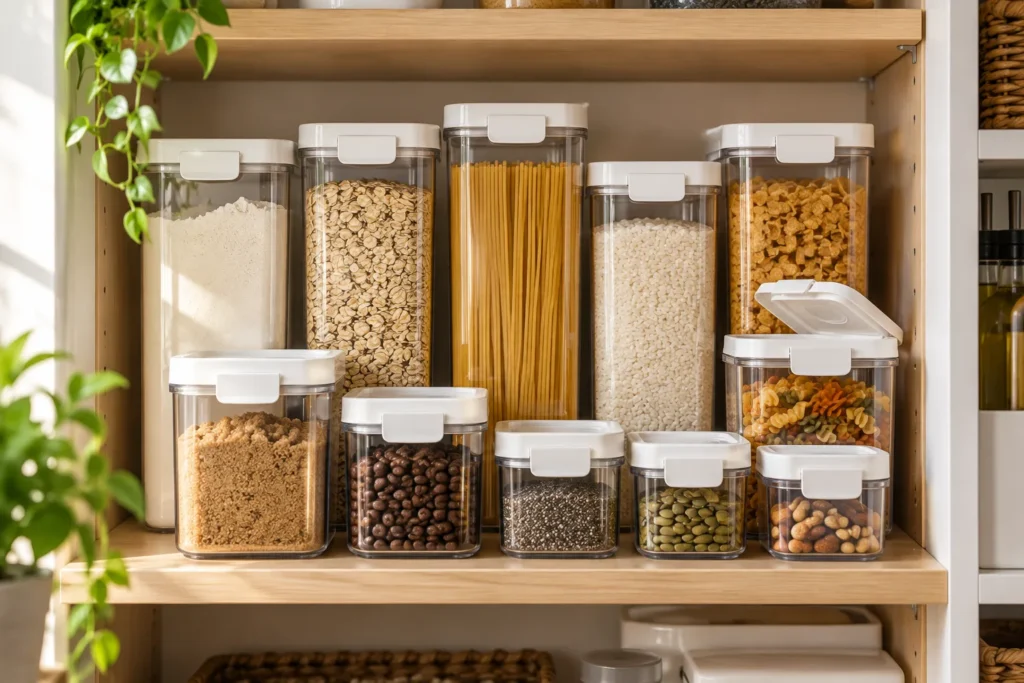
Decanting looks great on Pinterest and is a lot of work. Done selectively, it saves space; done for everything, it wastes your Sunday.
- Decant only what you buy on repeat
- Note dates on every canister
- Store empties nested at the back
Decant the five or six staples you always buy — flour, sugar, rice, oats, pasta, cereal — into square airtight canisters. Square containers pack a shelf edge to edge. The pantry containers comparison covers which set to buy.
Rental-friendly? Yes.
The catch: cut the best-by date off each bag and drop it in the canister, or write it on the label.
Check price on Amazon — around $40 for a set of seven.
Step 7. Contain everything else in bins
[IMG: packaged foods grouped into open clear bins on a pantry shelf | alt: Illustration of packaged food grouped in bins]
Everything you didn’t decant stays in its packaging — but loose packets and boxes are what turn a shelf back into a pile.
- One category per bin
- Same bin size along each shelf
- Handles facing out
One clear bin per category: breakfast, baking, snacks, pasta, packets. Bins with handles pull out like drawers, so you never dig behind the front row again.
Rental-friendly? Yes.
The catch: choose one bin size per shelf so they line up and stack; this set has four large and four small.
Check price on Amazon — around $35 for eight.
Step 8. Fix the corners and the cans
[IMG: a turntable in a pantry corner and cans on a stepped riser | alt: Illustration of a pantry corner turntable and can riser]
Corners and can stacks are where food gets lost.
- Turntable in every deep corner
- Can rack on a low shelf
- Tall bottles beside the turntable, not on it
Put a two-tier turntable in each deep corner for sauces, jars and short bottles, and a tiered can rack on a lower shelf so every label is visible. Those two pieces solve the two most common reasons people buy food they already have.
Rental-friendly? Yes.
The catch: turntables wobble if the top tier is overloaded; keep heavy jars on the bottom tier. The lower tier of this one has about six inches of headroom, so tall bottles stand beside it.
Turntable: Check price on Amazon — around $10–15.
Can rack: Check price on Amazon — around $20–25.
Step 9. Label every bin and canister
Labels are what keep the system working when someone else unpacks the groceries.
- Front of every bin
- Front and lid of every canister
- Backstock bins labeled too
Label the front of every bin and the front and lid of every canister. Printed vinyl labels hold up in a humid kitchen; or use our free printable pantry labels on sticker paper.
Rental-friendly? Yes — labels go on the containers, not the shelves.
The catch: chalkboard labels smudge near the stove; printed vinyl lasts.
Check price on Amazon — around $10–15.
Step 10. Add an eat-first basket and an inventory list
The last two pieces keep the reset from undoing itself.
- Eat-first basket at eye level
- Running-low list on the door
- Restock from the list, not from memory
An eat-first basket at eye level holds anything open or close to its date, so it gets used first. A magnetic dry-erase board on the fridge door (it needs a metal surface) tracks what’s running low, which becomes next week’s shopping list.
Rental-friendly? Yes.
The catch: both only work if they’re used — empty the basket into meals weekly and update the list as things run out.
Eat-first basket: Check price on Amazon — around $12–15 for a set of two.
Dry-erase list: Check price on Amazon — around $10–15.
The weekend at a glance
| Step | Day | Time |
|---|---|---|
| 1. Empty | Saturday | 45–60 min |
| 2. Check dates | Saturday | 30 min |
| 3. Clean and line | Saturday | 30–45 min |
| 4. Measure | Saturday | 15 min |
| 5. Decide zones | Saturday | 15 min |
| 6. Decant staples | Sunday | 45 min |
| 7. Bins | Sunday | 30 min |
| 8. Corners and cans | Sunday | 15 min |
| 9. Labels | Sunday | 20–30 min |
| 10. Eat-first basket and list | Sunday | 10 min |
Shop for organizers between Saturday and Sunday, once you’ve measured. If you’re ordering online, do Saturday’s steps one weekend and Sunday’s the next.
What to measure
| Measure | Why it matters |
|---|---|
| Shelf depth | Bins and canisters must not stick out past the front edge |
| Shelf width | How many bins fit side by side, with room for handles |
| Height between shelves | Tall canisters and risers need clearance |
| Door clearance | Door racks need 3–4 inches or the door won’t close |
| Floor gap | Rolling carts and floor bins |
Mistakes that undo a pantry reset
- Shopping before emptying. You’ll buy for a pantry that’s about to get much smaller.
- Decanting everything. It doubles the work and the containers; decant staples only.
- Mixing bin sizes. One size lines up and stacks; three sizes leave gaps.
- Skipping labels. Unlabeled bins drift within a month.
Pantry reset FAQ
How long does a pantry reset take?
A small pantry takes about two half-days: three hours on Saturday to empty, sort, clean and measure, and two to three hours on Sunday to decant, contain and label. A single cabinet pantry can be done in one afternoon.
How often should you reset a pantry?
A full reset once or twice a year — January is ideal — and a ten-minute tidy as part of a weekly routine. The eat-first basket and running-low list keep it on track between resets.
Should I buy organizers before or after decluttering the pantry?
After. Decluttering and checking dates usually frees a quarter of the space, and measuring the empty shelves tells you exactly which sizes to buy. Buying first is the most common pantry organization mistake.
[IMG: vertical pin image of a weekend pantry reset with the post title | alt: Pinterest image of a pantry reset]
Start with an empty shelf
Block out Saturday morning, empty the pantry, and follow the steps in order. By Sunday evening you’ll have a pantry where everything is visible, dated and labeled. Doing this as part of a bigger January clear-out? It slots straight into the New Year home reset checklist.
Affiliate disclosure: Shelf and Nook is a participant in the Amazon Services LLC Associates Program and other affiliate programs. As an Amazon Associate we earn from qualifying purchases. Links on this page may be affiliate links, which means we may earn a commission if you make a purchase, at no extra cost to you. Read our full Affiliate Disclosure.