This post contains affiliate links. If you buy through them, we may earn a small commission at no extra cost to you. Learn more.
Meal prep saves time and money until the containers take over. Empty, they fill a cupboard with leaning stacks and loose lids. Full, they fill the fridge and leave no room for anything else. In a small kitchen, both problems arrive in the first week.
Meal prep container storage has two halves: where the containers live when they’re empty, and how they stack when they’re full. This guide covers both — how many containers you need, how to store bases and lids in a cabinet or a drawer, how to fit a week of meals into a small fridge, and how long prepped food keeps.
[IMG: a small kitchen cabinet with matching containers nested and lids filed upright | alt: Illustration of organized meal prep containers]
If you only buy three things
- One set of same-size meal prep containers — one size nests, stacks and shares lids. Check price on Amazon
- An adjustable lid organizer — files lids upright so you can take one without the rest falling. Check price on Amazon
- A clear fridge bin — holds the week’s meals in one pull-out stack. Check price on Amazon
Part 1: The right set
How many containers do you need?
| How you prep | Containers |
|---|---|
| Lunches only, one person | 5, plus 2 spare |
| Lunches and dinners, one person | 10 |
| Lunches, two people | 10, plus 2 spare |
| Ingredient prep (grains, proteins, chopped veg) | 4–6 larger containers |
Plus four to six small pots for sauces and snacks. That’s all. If your cupboard holds forty assorted containers, start with the container step in how to declutter a small kitchen.
One size, one brand
The single decision that fixes storage is buying one set in one size. Identical containers nest into one stack, the lids are interchangeable, and they stack square in the fridge. A rectangular container of about 28–36 oz (roughly 3.5–4.5 cups) holds a full meal.
Glass, plastic or silicone bags?
| Glass | Plastic | Silicone bags | |
|---|---|---|---|
| Weight | Heavy | Light | Very light |
| Staining and smells | None | Stains with tomato, curry | Can hold smells |
| Reheating | Microwave and oven (base only; check the maker’s limits) | Microwave only if labeled safe | Check the label |
| Empty storage | Often don’t nest fully | Nest tightly | Flat |
| Best for | Reheating at home, sauces | Carrying to work, small cupboards | Freezing, snacks, marinades |
1. A set of identical meal prep containers
Mixed containers are why the cupboard doesn’t work.
Choose glass if you reheat at home and have a low shelf strong enough for the weight; choose lightweight plastic if you carry lunch on foot or on public transport, or your cupboard is small. Either way: one size, tight-fitting lids, and buy the number in the table.
Rental-friendly? Yes.
The catch: glass sets are heavy — store them low. Take the lid off or open the vent before microwaving.
Glass set: Check price on Amazon — around $30 for five.
Plastic set: Check price on Amazon — around $15 for 15.
Part 2: Storing empty containers
[IMG: diagram of nesting containers by size and filing lids upright | alt: Diagram of nesting containers and filing lids]
Two rules: nest the bases, file the lids. Bases stack inside each other in one pile. Lids stand upright on their edge, like files, in a holder beside them. Storing containers with lids on uses three or four times the space.
2. An adjustable lid organizer
[IMG: container lids standing upright like files in an adjustable organizer | alt: Illustration of lids filed upright in an organizer]
Lids are the real problem: flat, slippery and all slightly different.
A lid organizer with adjustable dividers stands them on edge, sorted by size. It sits in a cabinet, in a deep drawer or on a shelf.
Rental-friendly? Yes.
The catch: measure the height: lids on edge need a shelf or drawer taller than the largest lid. This one takes lids up to 9 inches wide.
Check price on Amazon — around $15–22.
3. In a lower cabinet: a pull-out organizer
Base cabinets are deep, and containers at the back never come out.
A freestanding pull-out shelf sits on the cabinet floor with adhesive or its own weight and slides everything forward. Put nested bases at the front, lids filed behind or beside. More cabinet layouts are in kitchen cabinet organization.
Rental-friendly? Yes — choose a no-screw version that sits or sticks in place.
The catch: measure the cabinet opening, not the interior; hinges and the center stile reduce it.
Check price on Amazon — around $30.
4. In a deep drawer: dividers
A deep drawer is the best place for containers, if you have one.
Adjustable dividers split it into lanes: one for nested bases, one for lids on edge, one for small pots. Everything is visible from above. See kitchen drawer organization for measuring.
Rental-friendly? Yes — spring-loaded dividers leave no marks.
The catch: the drawer needs to be about 5 inches deep or more for lids to stand.
Check price on Amazon — around $18–25.
5. On a shelf: a riser
Upper cabinets waste the air above a short stack.
A shelf riser gives two levels: bases beneath, lid organizer on top. Keep glass on the lower level.
Rental-friendly? Yes.
The catch: check the riser’s weight limit if you store glass on it. These hold up to 33 pounds each.
Check price on Amazon — around $20–27.
6. No cupboard space at all: use the door
[IMG: container lids in an organizer hung over the inside of a cabinet door | alt: Illustration of lids stored on the inside of a cabinet door]
In the smallest kitchens there’s no shelf to spare.
An over-the-cabinet-door organizer holds lids or a slim stack of plastic bases on the inside of a door. Lightweight containers only.
Rental-friendly? Yes.
The catch: check the shelf inside the cabinet doesn’t block it when the door closes.
Check price on Amazon — around $15–20.
7. Reusable silicone bags and a drying rack
Bags take the least room of any container, but they’re awkward to dry.
Store them flat in a drawer or upright in a small bin. A countertop drying rack with prongs holds them open so they dry fully before storage.
Rental-friendly? Yes.
The catch: bags stored damp develop smells; dry them completely.
Check price on Amazon — around $10–15 for a set of three.
Part 3: Full containers in the fridge and freezer
[IMG: fridge layout for a 5-day meal prep: one shelf for the week, sauces separate | alt: Diagram of a fridge layout for 5-day meal prep]
8. One shelf, one bin for the week
Prepped meals scattered across shelves get forgotten.
Give meal prep one shelf — the middle one is ideal — and stack containers two high, by day, with tomorrow’s at the front. A clear bin holds the stack and pulls out in one piece. For choosing bins, see fridge organizer bins compared; for the full shelf plan, small fridge organization.
Rental-friendly? Yes.
The catch: don’t stack more than two or three high or pack them tightly; cold air needs to circulate.
Check price on Amazon — around $20–30 for a set.
9. Keep sauces and wet things separate
Dressed salads and sauced grains go soggy by Wednesday.
Small leak-proof pots keep dressings, sauces and crunchy toppings apart until you eat. Store them together in a small bin or the door. Wash and store salad leaves separately; the produce storage guide explains how.
Rental-friendly? Yes.
The catch: small lids vanish; keep the pots and their lids in one tub in the cupboard.
Check price on Amazon — around $10–15.
10. Label with the date
By Thursday nobody remembers when Sunday’s chicken was cooked.
Write the contents and date on a removable label or directly on a glass lid with a dry-erase marker. It takes ten seconds per container.
Rental-friendly? Yes.
The catch: some markers wipe off in a damp fridge; removable freezer labels are more reliable.
Check price on Amazon — around $8–12.
11. Freeze half
A small fridge can’t hold ten meals, and most cooked food is at its best for three to four days.
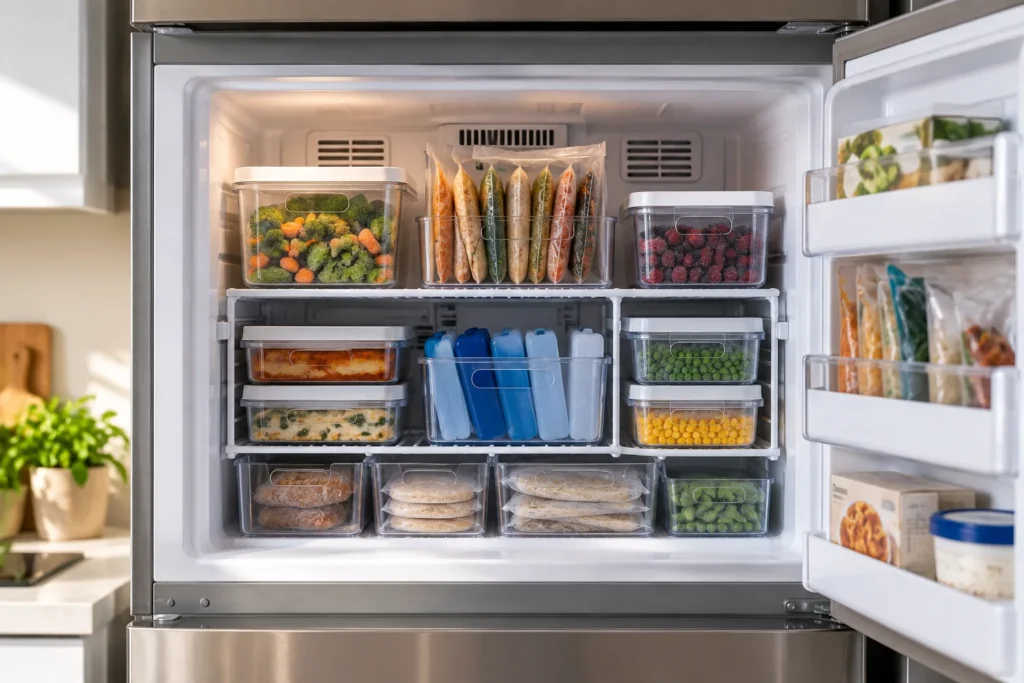
Refrigerate meals for the first three or four days and freeze the rest the day you cook. Freeze flat in bags or in portion trays, then stand them upright like files. Leave room at the top of rigid containers for liquids to expand. See how to organize a small freezer.
Rental-friendly? Yes.
The catch: thaw overnight in the fridge, not on the counter.
Freezer portion trays: Check price on Amazon — around $20–35.
Silicone freezer bags: Check price on Amazon — around $10–15 for a set of three.
How long prepped food keeps
| Food | Fridge (40°F or below) | Freezer |
|---|---|---|
| Cooked meat, poultry, fish dishes | 3–4 days | 2–3 months for best quality |
| Cooked rice and grains | 3–4 days; cool and refrigerate quickly | About 2 months |
| Soups and stews | 3–4 days | 2–3 months |
| Hard-boiled eggs | Up to 1 week | Don’t freeze |
| Cut raw vegetables | 3–5 days | Varies; best blanched first |
These follow general US food-safety guidance for leftovers. Refrigerate cooked food within two hours, in shallow containers so it cools quickly, and when in doubt, throw it out.
The weekly rhythm
- Before you cook: clear the meal prep shelf and wash any containers still in the fridge.
- Cook and portion. Let food stop steaming, then lid it and refrigerate within two hours.
- Label, stack by day, freeze half.
- Through the week: containers come home, get washed and dried, bases nested and lids filed. Don’t let them collect in a bag.
Prep day fits naturally into the Sunday reset routine. An insulated lunch bag keeps the meal cold on the way. Check price on Amazon — around $15–25.
Mistakes
- Too many containers. Ten identical ones beat forty assorted.
- Storing them with lids on. It triples the space.
- Putting them away damp. Trapped moisture smells.
- Prepping seven days for the fridge. Freeze what you won’t eat in four.
- Microwaving plastic that isn’t labeled safe, or any container with its lid sealed.
Meal prep container FAQ
How do you store meal prep containers in a small kitchen?
Keep one set in one size, nest the bases in a single stack and stand the lids on edge in a lid organizer beside them. A deep drawer with dividers works best; otherwise use a lower cabinet with a pull-out organizer or a shelf riser.
Should I store containers with the lids on?
No, not when they’re empty. Lids-on storage takes three to four times the space. Nest the bases and file the lids separately. The exception is small sauce pots, which are easier to keep as pairs in one tub.
How long does meal prep last in the fridge?
Most cooked meals keep three to four days in a fridge at 40°F or below. If you prep for five days or more, freeze the later portions on the day you cook and thaw them overnight in the fridge.
[IMG: vertical pin image of meal prep container storage with the post title | alt: Pinterest image of meal prep container storage]
Start with the lids
Tonight, match every container to a lid and recycle the orphans. Nest what’s left and stand the lids on edge. That one step makes the cupboard work; a matching set and a fridge bin finish the job.
Affiliate disclosure: Shelf and Nook is a participant in the Amazon Services LLC Associates Program and other affiliate programs. As an Amazon Associate we earn from qualifying purchases. Links on this page may be affiliate links, which means we may earn a commission if you make a purchase, at no extra cost to you. Read our full Affiliate Disclosure.